Back-to-School Treasure Hunt

We had lovely weather for our Annual (how many years do you have to do something before it can be "annual"?) Back-to-School Treasure Hunt.  There was some slight unpleasantness in the form of a screaming baby in the bike trailer, but this subsided periodically and we all had a great time anyway.  We love family bike rides, especially with treasure involved!

A shadowy figure hunts for clues

We had a picnic mid-way through, with zucchini-tomato turnovers (vegetables fresh from the garden!)

And angel-food cake, with lemon curd for dipping

The boys did not let the food distract them from the task at hand, however.

(Although some of them were distracted anyway.)

Baby Junie, getting into the spirit of things, discovered a treasure of her own: FEET!  This was her first time finding them and she was VERY pleased.  As was I.  I love it when babies eat their own toes.

Getting close . . . 

Aha!

Treasure!  (New backpacks for the older ones, books for the younger ones)

2

Mountain flowers

We went hiking up near Cedar Breaks a couple weeks ago, and the wildflowers up in those mountains were SO beautiful.  The air was still cool up that high, so it almost felt like we'd gone back in time to Spring.

Lots of meadows just had sprinklings of color, like this . . . 

that resolved themselves into separate flowers when you got up closer.  (The purples look like some kind of lupine---I have lupines in my yard and I love them!)

Then there were some meadows that were just totally full of flowers.  These are mountain sunflowers, I think. A photograph can't even capture what it was like to be surrounded by all that yellow.


More lupines, and Indian paintbrush!  I remember seeing a lot of this in New Mexico when I was little.

Mountain columbine.  These are some of my favorite flowers too, especially growing in the wild.  They look so starry and delicate, it seems impossible they could be hardy enough to survive in a harsh mountain climate!

Sunflowers near Navajo Lake.  So lovely!
1

Peanut Butter Muffins

These peanut butter muffins turned out to be everyone's favorite.  The best part is how moist they are.  I'm having a hard time conveying in pictures just how moist.  But they're almost like a soft peanut butter . . . cookie?  Really good, especially the top edges.

These have an interesting mixing method.  (Here is where I got the original recipe.)  You recall that usually in muffins, you use a specific mixing method: dry ingredients, wet ingredients, fold together until just combined.  You don't want to develop the gluten like you do in yeast bread; if you overmix, the muffins won't have a nice tender crumb.  Or, if your muffin recipe calls for softened butter instead of oil, you probably use the creaming method, like you would for cake.  I learned all this from my mom when I was little.

These muffins, though, have you do weird things like mix the eggs with part of the brown sugar---and add the butter before the peanut butter.  Strange.  I couldn't see why it was necessary, so I didn't do it the first time, and my muffins turned out flat.  And sure, looks aren't everything, but they just weren't as moist as I felt they might be, either.  So I wanted to try to improve them.

Flat muffins can be caused by a few different things.  Filling the cups too full (they are only supposed to be filled three-fourths of the way) can do it , and so can a too-low baking temperature.  So next, I tried preheating the oven to 425, and immediately turning it down to 350 once I put the muffins in.  This is supposed to help "oven spring."  I also made sure not to overfill my muffin cups.  But still, they were flat:  

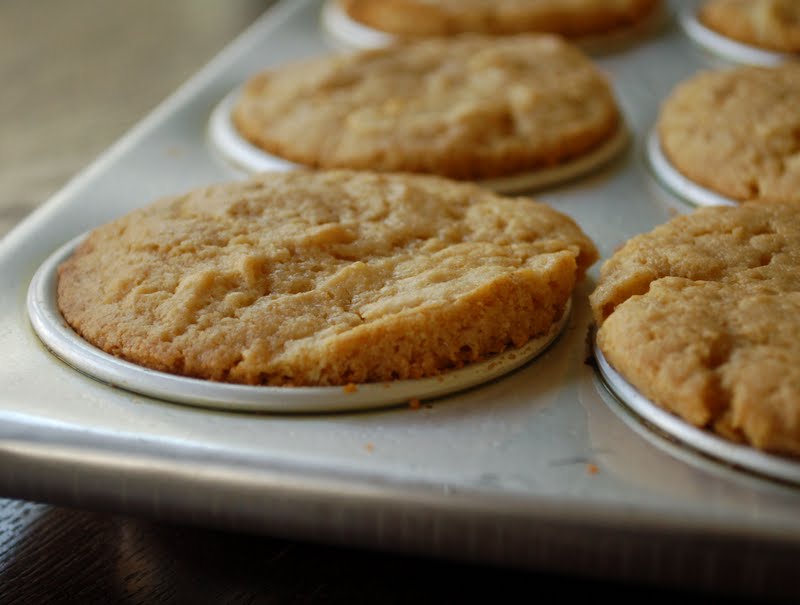
Okay, now I was ready to sheepishly try the mixing method the recipe called for in the first place.  Using that method (and the regular temperature, 350 degrees) yielded these:
They aren't perfectly domed, but much better.  See the crust of the muffin in the foreground?  It rose up above the rim of the pan before hardening.  I like to see that because it shows they are getting a lot of "oven spring."

Then I tried two more things: (1.) using the called-for mixing method, and ALSO preheating the oven to 425.  I tried baking them at 425 for 12 minutes (many of my muffin recipes call for high temperatures like these, with shorter baking times---as opposed to the 350 degrees/25 minutes in the original recipe) and they looked good, but I thought they were a bit dry.  
Then (2.) I tried the different mixing method, preheating the oven to 425, and then immediately turning it down to 350 when the muffins were in.  Perfect.  And there we have my somewhat scientific method (can one be somewhat scientific in method?  Must ask my brother Karl) of testing this recipe.  I don't know why the mixing method works, but it appears to, so I'll do it.


After wading through the preceding discourse, you deserve some peanut butter muffins.  So here is the recipe, adjusted as I have described.  I hope it yields you perfectly delicious muffins.

Peanut Butter Muffins

1/3 c. butter, softened
1 1/2 c. brown sugar, divided
1/2 t. salt
1 t. vanilla
1/2 c. peanut butter
2 large eggs, beaten
2 1/2 t. baking powder
2 c. flour
3/4 c. milk

Preheat oven to 425 degrees.  Put the softened butter in a large bowl and gradually add 1 c. of the brown sugar, the salt, and the vanilla, and cream together until light and fluffy.  Next add the peanut butter and cream again.  Set aside.

In another bowl, whisk the eggs together until well-beaten.  Add the remaining 1/2 c. brown sugar and mix until completely blended.  Stir into the creamed mixture gradually, until well blended.

In (yet another) bowl, [you can see why I didn't want to use this method right off the bat; I don't like dirtying so many bowls] sift together the baking powder and flour.  Gradually add these dry ingredients alternately with the 3/4 c. milk to the creamed mixture, until everything is combined.

Spoon batter into greased muffin tin, filling cups 3/4 full.  (I prefer NOT to use cupcake liners for these, but you could if you wish.)  Put muffin tins into oven, and immediately turn oven temperature down to 350.  Don't forget, or your muffins will burn.  [I've done this. Twice.]  Bake for 16-17 minutes or until tops of muffins spring back when touched lightly with your finger.
1

The best thing we've done this summer

You know how our boys like carwashes, right?  Well . . .

This is an idea that has many roots.  I guess it started with this:
and also drew inspiration from this:

And then Beth sent me this picture, and I immediately knew we had to make a life-sized "carwash" for the kids.  (First I was planning to make it for Sebby for his birthday, but then it started turning into such a good idea that I didn't have the heart to give it to ONLY Sebby.  We never would have been able to match it with presents for the others' birthdays.)  I asked Sam if he thought we could figure it out, and he said he thought so.

And then I found these plans, so we didn't even have to figure out as much as I thought.  I just had to come up with the finishing touches, which is probably one of my favorite things to do in the whole world.  In fact,  I was telling Sam how much I love it: I love thinking of just the right thing to give (of course it helps if the receiver has an obsession with something) and then I love making things that are just pretend but they sort of actually work, and I love thinking of all the tiny details I can, and I love figuring out things that you can use as other things (I guess they call that "re-purposing," right?).  SO FUN.  I got excited about working on it every night, and when we were done I was sad.  Sam said I should have a job as an "imagineer" working on theme parks, because that's exactly what they get to do.  Sounds good to me.

Anyway, here it is in all its glory.  Everyone who goes by our house turns to look, and then smiles, and then I know they are wishing they could run through it too.  And who can blame them?

Sponge ball tutorial here

Card reader (made of craft foam)

Moveable stop and go lights (also made of craft foam)
The other lights say "Wheel shine," "Spot-free rinse," "Tri-colored foam," and "Pre-soak"

I knew I had to get all the details right because my boys are basically the world's leading experts on carwashes.  (I forgot the air dryers, though.  Abe pointed it out kindly.  "Where are the air dryers?  Oh---it's okay, Mommy.  There are lots of other things.  It's still fun.")
I got most of this stuff from the dollar store.  Pom-poms (or is it pom-pons?) and sponges.  The red brush on top is the cover of a duster from IKEA.

Those beige things are paint rollers and the blue ones are dusters, also from the dollar store.

The rainbow-colored flaps are made of various vinyl remnants, except orange and purple are fleece remnants (did you know fleece is waterproof? It dries really fast).  I got them all on the clearance table at the fabric store.  I just folded them in half (so they'd be colorful on both sides) and sewed a seam on top so they could slide onto the PVC pipe.  Then I cut them into strips.


And here it is in action (there are tiny holes drilled in the PVC pipe to let the water out):
Waiting in the queue

Seb gasps

Brave Daisy

Not sure what Seb is doing here

8
Powered by Blogger.
Back to Top